


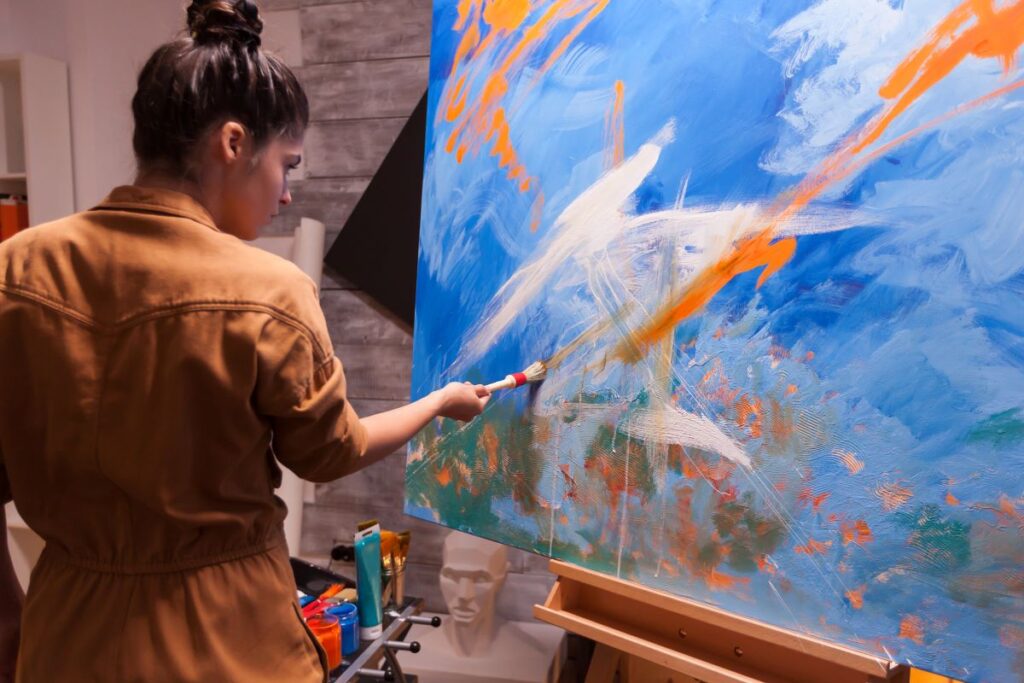
Acrylic painting has become one of the most popular mediums among new artists because it is versatile, fast drying, affordable and extremely forgiving. Whether you want to paint landscapes, portraits, abstracts or still life compositions, acrylics allow you to experiment fearlessly and grow your artistic confidence. This guide covers the most essential Acrylic Painting Techniques that every beginner should master. The goal is to give you a detailed, SEO optimized, structured and practical resource that teaches you every foundational skill you need to paint stunning artworks.
Before we dive into the techniques, remember that acrylic painting is all about practice and exploration. No matter how many tutorials you read, your best teacher will always be the brush in your own hand. Think of these techniques as the building blocks of all great acrylic artworks.
What Makes Acrylic Painting Perfect for Beginners
Acrylic paint offers several advantages that make it ideal for newcomers. These benefits will help you understand why Acrylic Painting Techniques are easy to learn and apply.
Fast Drying Time
Acrylics dry faster than oils or gouache, which means you can build multiple layers quickly. This gives beginners more flexibility and reduces frustration from long waiting times.
Easy Clean Up
Acrylics are water-based. This means no smelly solvents, no toxic chemicals and no complicated cleanup routines. A little soap and water is enough to clean brushes.
Highly Versatile
You can create effects similar to watercolor, oil or even ink simply by adjusting the amount of water or medium you mix with your paint.
Affordable
Acrylic materials are inexpensive compared to oils, making them perfect for learning and experimentation without fear of wasting supplies.
Beginner Friendly
Most Acrylic Painting Techniques can be learned in just a few minutes, and mistakes are easy to paint over because acrylics are opaque.
Tools You Need to Practice Acrylic Painting Techniques
Before mastering any technique, you need the right tools. Below is a simple table to guide beginners on what to buy without wasting money.
Essential Acrylic Painting Tools Table
| Item | Description | Why You Need It |
|---|---|---|
| Acrylic Paints | Student or professional grade | The core medium for all Acrylic Painting Techniques |
| Brushes | Round, flat, filbert and detail | Each brush shape works for different painting effects |
| Canvas or Paper | Canvas board, stretched canvas or acrylic paper | Surface to practice and make finished paintings |
| Palette | Plastic, glass or wooden palette | For mixing colors and creating smooth gradients |
| Water Container | Cup or jar | To rinse brushes between colors |
| Palette Knife | Plastic or metal | For texture, mixing and applying paints |
| Acrylic Mediums | Gel, matte, gloss, retarder | To extend drying time, create texture or change finish |
| Rag or Paper Towel | Lint free | For wiping excess paint or cleaning mistakes |
This setup is more than enough to learn all the techniques covered in this guide.
1. Dry Brushing Technique
Focus Keyword Usage: Acrylic Painting Techniques
Dry brushing is one of the simplest but most effective Acrylic Painting Techniques. It involves using a small amount of paint on a completely dry brush to create soft, scratchy strokes.
When to Use Dry Brushing
This technique is commonly used to show texture and highlight details such as:
• Wood grain
• Hair and fur
• Clouds
• Grass
• Rocks
• Dusty or rustic surfaces
How to Do Dry Brushing
- Dip the very tip of your brush into thick acrylic paint.
- Wipe most of the paint off using a cloth or paper towel.
- Lightly drag your brush across a dry surface.
- Build layers slowly to create realistic textures.
2. Wet on Wet Technique
This is one of the foundational Acrylic Painting Techniques, similar to watercolor blending. It involves applying wet paint over another layer of wet paint so that the colors blend smoothly.
Why Wet on Wet Is Perfect for Beginners
This technique helps you understand color mixing, edge softness and smooth transitions.
Best Uses
• Painting skies
• Creating water effects
• Soft backgrounds
• Blended abstracts
How to Do Wet on Wet
- Apply a base layer of watered-down acrylic.
- While the layer is still wet, add another color.
- Blend them gently using a soft brush or sponge.


3. Scumbling Technique
Scumbling is a dry but light layering method that gives a hazy, soft and atmospheric look. It is used in many Acrylic Painting Techniques to soften transitions and build depth.
Effects You Can Achieve
• Mist or fog
• Smoky textures
• Soft highlights
• Soft shadows
• Dreamy transitions
How to Scumble Correctly
- Load a dry brush with a small amount of light paint.
- Hold the brush at an angle.
- Apply gentle, circular strokes to lightly skim the surface.
- Layer slowly until you get the desired atmosphere.
4. Layering Technique
Layering is one of the most important Acrylic Painting Techniques because acrylics dry quickly, allowing you to stack multiple coats without muddying your colors.
Why Layering Matters
• Creates depth
• Adds realism
• Helps define shapes
• Allows corrections
• Strengthens color vibrancy
How to Do Layering
- Start with thin, light layers.
- Let each layer dry completely.
- Add darker or richer paint gradually.
- Build until the painting has depth and structure.
5. Glazing Technique
Glazing is the secret technique behind glowing, luminous paintings. This method uses thin transparent layers of paint mixed with a glazing medium.
Benefits of Glazing
• Creates depth
• Enhances vibrancy
• Adjusts color temperature
• Softens harsh transitions
• Adds a professional finish
How to Apply a Glaze
- Mix a small amount of paint with glazing medium.
- Spread a thin transparent layer on the canvas.
- Repeat with multiple glazes to intensify the effect.
6. Underpainting Technique
Underpainting is one of the most valuable Acrylic Painting Techniques for beginners and professionals alike. This method involves creating a monochrome sketch or base layer before applying the final colors. It helps you plan your composition, define shadows and understand the values in your artwork.
Why Underpainting Is Essential
Underpainting allows beginners to avoid common mistakes such as:
• Incorrect proportions
• Weak contrast
• Unbalanced composition
• Confusing areas of light and shadow
By establishing these fundamentals early, the rest of the painting becomes much easier.
How to Do Underpainting
- Choose a single color like burnt sienna, umber or any earth tone.
- Thin the paint with water to create a transparent layer.
- Block in the basic shapes of your composition.
- Add shadows with slightly darker mixtures.
- Let it fully dry before applying new layers.
7. Stippling Technique
Stippling is a method that uses small dots to create shading, patterns or textures. It may seem slow, but it is one of the most visually appealing Acrylic Painting Techniques.
What Stippling Is Used For
• Painting foliage
• Adding texture to rocks
• Creating pointillism artworks
• Adding realistic skin texture in portraits
• Showing grainy or sandy surfaces
How to Practice Stippling
- Dip a stiff brush in thick acrylic paint.
- Tap the tip of the brush onto the canvas repeatedly.
- Add more dots for darker areas and fewer dots for lighter areas.
- Use two or three colors to make the texture more realistic.
8. Impasto Technique
Impasto is a thick and expressive painting method that adds dimension and energy to your artwork. Unlike traditional smooth blending, this method focuses on texture and bold strokes.
Why Beginners Love Impasto
• It hides mistakes easily
• It adds character and movement
• It requires loose, confident strokes
• It is ideal for abstract or impressionistic styles
How to Do Impasto
- Use a palette knife instead of a brush.
- Apply thick acrylic paint directly onto the canvas.
- Spread or sculpt the paint using knife strokes.
- Layer colors without fully mixing them to preserve texture.
9. Splattering Technique
Splattering is a fun, energetic and unpredictable technique that adds a dynamic feel to your paintings. It is especially useful in modern and abstract acrylic artworks.
Best Uses for Splattering
• Creating stars in a night sky
• Adding water droplets
• Making abstract textures
• Showing motion or energy
How to Do Splattering
- Dilute acrylic paint with a little water.
- Dip a brush into the mixture.
- Flick the bristles using your finger or tap the brush handle.
- Build multiple layers with different colors for more depth.
10. Sgraffito Technique
Sgraffito involves scratching into wet paint to reveal the layer below. This method adds intricate patterns, highlights or textures without much effort.
When to Use Sgraffito
• To draw fine lines
• To scratch patterns into thick paint
• To reveal contrasting underpainting
• To highlight fur or hair details
How to Practice
- Apply a thick layer of acrylic paint.
- While it is still wet, use a palette knife, toothpick or fork.
- Scratch into the paint to reveal the color underneath.
- Create small details or textured backgrounds.
11. Blocking In Technique
Blocking in is one of the most beginner-friendly Acrylic Painting Techniques. It helps artists visualize the overall painting before diving into details.
Why Blocking In Helps Beginners
• It prevents overworking small areas
• It ensures proper composition
• It helps you focus on major shapes and colors
• It builds the painting step by step
How to Practice Blocking In
Add refinement slowly after blocking in.
Use medium-sized brushes.
Mix basic color groups: sky, ground, subject, shadows.
Paint simple shapes without details.
12. Color Mixing and Blending Techniques
Color mixing is the backbone of all Acrylic Painting Techniques. Without understanding color, even the best brushes cannot save your painting.
Key Concepts
• Primary colors (red, blue, yellow)
• Secondary colors (green, orange, purple)
• Complementary colors
• Warm and cool tones
• Value (lightness and darkness)
How to Master Blending
- Use a soft brush.
- Work fast while the paint is still wet.
- Apply two colors next to each other.
- Blend gently using horizontal or circular strokes.
- Layer more paint if needed.
Tabular Guide to Acrylic Brush Types for Beginners
Here is a helpful table that explains which brush to use for each Acrylic Painting Technique.
| Brush Type | Shape Description | Best For |
|---|---|---|
| Flat Brush | Straight edge, long bristles | Blocking in, glazing, blending |
| Round Brush | Pointed tip | Details, lines, highlights |
| Filbert Brush | Oval-shaped tip | Soft blending, flowers, portraits |
| Fan Brush | Spread-out bristles | Grass, fur, leaves, textures |
| Angular Brush | Diagonal edge | Sharp angles, precision strokes |
| Detail Brush | Thin and tiny | Small highlights and fine lines |
How to Hold Your Brush Correctly
Most beginners don’t realize that brush control is as important as color mixing. Proper brush angles and pressure help you master multiple Acrylic Painting Techniques effortlessly.
Brush Holding Tips
• Hold the brush lightly, not tightly
• For details, hold near the ferrule
• For loose, expressive strokes, hold near the end
• Experiment with pressure—light pressure gives thin lines, extra pressure gives thick strokes
13. Gradient Technique
Gradients or smooth transitions are essential in skies, oceans, backgrounds and portrait shading.
How to Create a Smooth Gradient
- Choose two colors that blend well.
- Apply the first color on one side.
- Apply the second color on the opposite side.
- Blend the middle while the paint is still wet.
- Use horizontal strokes for skies and vertical strokes for objects.
14. Dabbing Technique
Dabbing is a great way to apply soft, textured layers without using traditional strokes. It is one of the easiest textures in Acrylic Painting Techniques.
Best Uses
• Leaves
• Bushes
• Flowers
• Textured clouds
• Underwater scenes
How to Do It
- Use a sponge or a dry brush.
- Dip it lightly in paint.
- Dab gently to create irregular patterns.
- Use multiple greens or blues for more realism.
Comparison Table of All Acrylic Painting Techniques for Beginners
This table summarizes what you’ve learned so far and helps reinforce which technique to use for each situation.
| Technique | Difficulty Level | Best For | Tools Needed |
|---|---|---|---|
| Dry Brushing | Easy | Texture, highlights | Dry brush, thick paint |
| Wet on Wet | Easy | Blending skies, soft backgrounds | Soft brush, water |
| Scumbling | Medium | Fog, smoky effects | Dry brush |
| Layering | Easy | Depth, realism | Any brush |
| Glazing | Medium | Glow, transparent color | Glazing medium |
| Underpainting | Easy | Values, shadows, planning | Thin paint |
| Stippling | Medium | Texture, foliage | Stiff brush |
| Impasto | Medium | Thick texture | Palette knife |
| Splattering | Easy | Stars, droplets, abstract | Wet brush |
| Sgraffito | Easy | Scratch patterns, details | Pointed tool |
| Blocking In | Easy | Composition | Flat brush |
| Blending | Medium | Smooth transitions | Soft brush |
| Gradient | Easy | Skies, backgrounds | Wide brush |
| Dabbing | Easy | Leaves, texture | Sponge |
| Wash | Easy | Backgrounds | Diluted paint |
| Feathering | Medium | Soft shading | Soft brush |
| Two-Tone Brush | Medium | Flowers, leaves | Flat brush |
Step-by-Step Practice Plan for Beginners
To fully master Acrylic Painting Techniques, beginners should follow a structured practice routine. This schedule ensures balanced growth in both creativity and technical skill.
Week 1 – Fundamentals
• Learn brush holding
• Practice dry brushing
• Do 5 gradient exercises
• Create simple backgrounds using wash technique
Week 2 – Texture and Depth
• Practice scumbling and stippling
• Try impasto strokes
• Paint a textured sky using wet on wet
Week 3 – Composition and Values
• Create an underpainting
• Block in shapes for a landscape
• Add basic color layers
Week 4 – Beginner Projects
• Paint a small flower bouquet using dabbing
• Create an abstract impasto artwork using a palette knife
• Paint a night sky using splattering and glazing
By the end of this one-month plan, any beginner will feel significantly more confident in using different Acrylic Painting Techniques.
Conclusion
Acrylic painting is one of the most accessible and enjoyable art mediums for beginners. With the right approach and consistent practice, anyone can master the essential Acrylic Painting Techniques covered in this guide. Whether you want to create realistic portraits, calming landscapes, bold abstracts or creative mixed media artworks, these techniques give you the foundation you need.
Remember that every painting is a learning experience. Allow yourself to experiment, make mistakes and explore freely. Over time, your brushstrokes will become more confident, your color choices more intentional and your art more expressive.
Your journey as an acrylic artist is just beginning. Enjoy every moment of it.
What are the most important Acrylic Painting Techniques for beginners?
Beginners should start with dry brushing, wet on wet blending, scumbling, layering and blocking in. These beginner-friendly Acrylic Painting Techniques help build a strong artistic foundation.
Which technique is best for painting skies with acrylics?
The wet on wet technique is one of the best options because it allows smooth gradients and natural shifts in color, perfect for sunsets and cloudy skies.
How can I make my acrylic paintings look more realistic?
Use underpainting to define values, layering to add depth and glazing to create subtle color transitions. These techniques work together to create realism.
What is the easiest Acrylic Painting Technique for beginners?
Dry brushing is often considered the easiest since it is simple, uses very little paint and creates instant texture.
Can acrylics be used like watercolor?
Yes, by diluting acrylic paint with a lot of water, you can achieve transparent washes similar to watercolor, perfect for soft backgrounds or atmospheric effects.
How can I keep acrylic paint from drying too fast?
Use a retarder medium, mist your palette occasionally with water or use a stay-wet palette to extend working time.
How do I pick the right brush for each technique?
Flat brushes are great for blocking and blending, round brushes excel at detail work, filbert brushes help create soft edges and fan brushes are perfect for texture like grass or fur.
How can I create glowing effects in acrylic painting?
Use glazing technique to build transparent color layers that allow light to pass through, creating a luminous glow in portraits, sunsets or fantasy art.
What is the best beginner project to practice Acrylic Painting Techniques?
Start with a night sky, floral painting or textured abstract art. These projects allow practice with multiple techniques such as blending, dabbing and splattering.
Is acrylic painting suitable for impressionism or realism?
Absolutely. Acrylics can create textured, expressive strokes for impressionism and also smooth, layered details for realism. For a deeper comparison between the two styles, you can read this helpful article: https://paintersdiary.com/impressionism-vs-realism/
What if I want to explore more expressive or modern art styles?
If you’re exploring expressive art forms or want to understand whether expressionism or abstract art suits your style better, this in-depth guide will help you: https://paintersdiary.com/expressionism-vs-abstract-art-whats-the-difference-and-which-should-you-try/