Learn when to remove painter’s tape to avoid residue and peeling. Follow these expert tips for flawless edges and a professional finish every time.
When to Remove Painter’s Tape for a Flawless Finish
Painter’s tape can be a DIYer’s best friend—it protects edges, creates crisp lines, and keeps your work looking clean and professional. But here’s the catch: removing painter’s tape at the wrong time can turn a perfect project into a frustrating mess. When pulled too soon, the paint may smudge; wait too long, and you’re left with peeling paint or sticky adhesive residue.
So, when is the right time to remove painter’s tape? Let’s break it down step by step.
The Risks of Leaving Painter’s Tape on Too Long
You might be tempted to leave the tape on well past your painting session. After all, you’re busy and cleaning up is probably your least favorite part, right? Unfortunately, waiting too long can lead to these annoying (and often time-consuming) problems:
1. Adhesive Residue
Knowing when to remove painter’s tape is essential for achieving clean paint lines without damaging the surface. Painter’s tape is designed to stick lightly and peel away cleanly when removed at the right time. Ideally, you should know when to remove painter’s tape — which is shortly after painting, once the paint is dry to the touch but not fully cured. Leaving it on too long allows heat, humidity, and pressure to strengthen the adhesive bond. This can cause the tape to leave behind sticky residue, requiring extra scrubbing or chemical cleaners to remove.
2. When to Remove Painter’s Tape to Avoid Damage
Leaving painter’s tape on for too long can cause peeling or cracking when you finally try to remove it. That’s why it’s important to know when to remove painter’s tape to prevent damage. As paint dries, it bonds more tightly to the surface—and sometimes to the tape itself. If you wait too long, pulling off the tape can rip chunks of paint away, leaving uneven edges or exposing the surface underneath. For the best results, always plan when to remove painter’s tape before the paint fully cures.
3. Time-Consuming Removal
Once the adhesive and paint have settled, removing the tape becomes a labor-intensive process. You might have to chip it off in tiny sections rather than peeling it away smoothly, which can be frustrating after putting in so much effort.
The Ideal Timeframe for Removing Painter’s Tape
The golden rule for painter’s tape removal? Timing is everything.
Wet Removal vs. Dry Removal
Painter’s tape should typically be removed while the paint is still tacky (wet removal) or just after it has dried to the touch (dry removal). The correct timing depends on several factors, including the type of paint you’re using, the drying time, and environmental conditions.
- For Water-Based Paints: Remove tape about an hour after your brush or roller leaves the surface, while the paint is still tacky but not fully dry.
- For Oil-Based Paints: Wait at least 6-8 hours, as these take longer to dry to the touch.
- Environmental Factors: High humidity or cooler temperatures can slow drying times, so adjust your tape-removal timing accordingly.
The “Sweet Spot”
For most projects, plan to remove the tape within 1-2 hours of finishing your last coat. Check the paint with your fingertip. If it feels slightly tacky but doesn’t smudge, it’s the ideal moment to peel the tape.
Step-by-Step Removal Guide
Now that you know when to remove the tape, here’s how to do it correctly for both wet and dry methods.
For Wet Removal
- Start at an edge or corner where the tape is easy to grab.
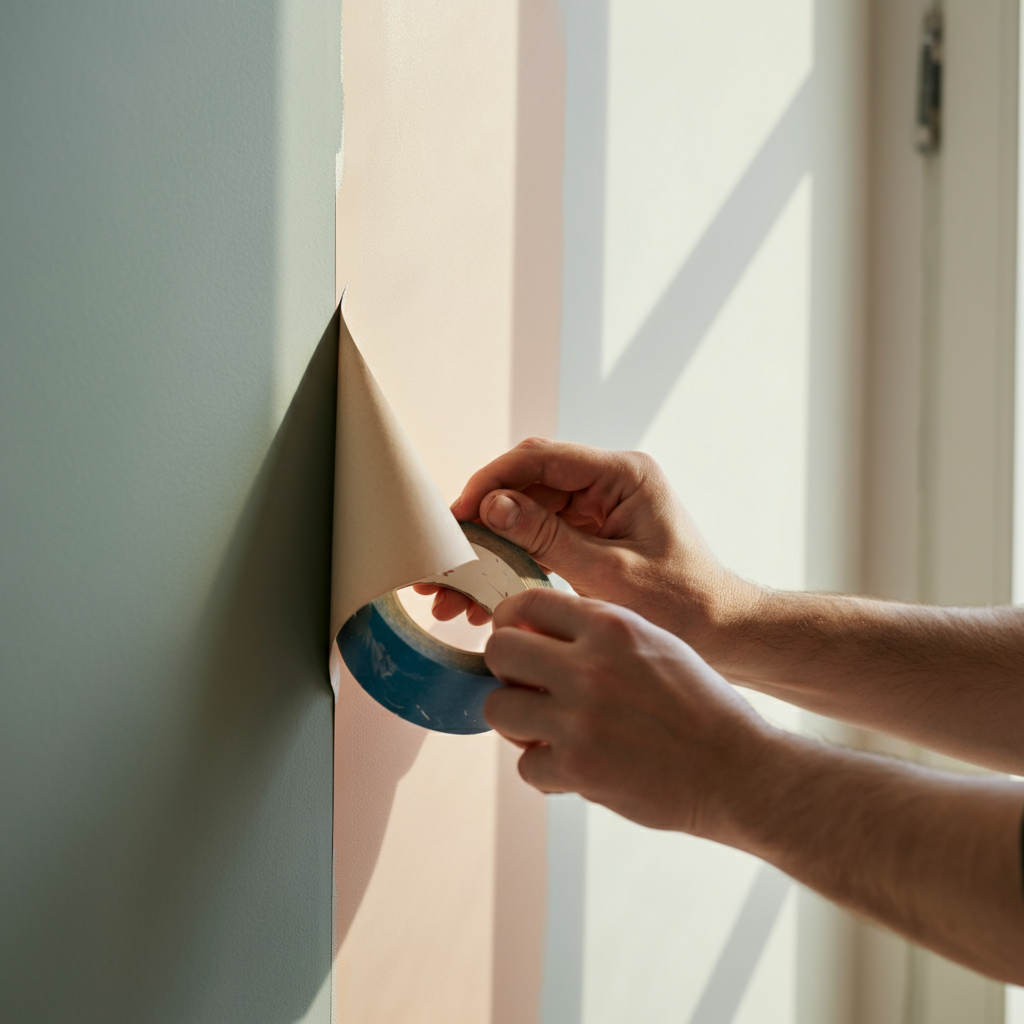
- Slowly peel the tape back at a 45-degree angle to the painted surface. Pull steadily and avoid quick, jerky movements.
- Hold the loose end close to the wall to maintain tension without disrupting the fresh paint.
For Dry Removal
- Knowing when to remove painter’s tape is important, but how you remove it matters just as much. Before pulling, score along the edge of the tape with a utility knife to prevent dried paint from peeling. Use gentle pressure to avoid damaging the surface beneath.
- When it’s time, pull the tape back slowly at a 45-degree angle to avoid cracking or flaking the dry paint. If the tape sticks or tears—especially if you’ve waited too long—use a hairdryer on low heat to soften the adhesive for easier removal. These simple steps help ensure clean lines and a flawless finish.
Tips for Clean Tape Removal
Even with perfect timing, there are techniques to ensure the edges stay sharp and the paint remains intact. Here are a few pro tips:
- Use the Right Tape: Invest in high-quality painter’s tape designed for clean removal. Blue tape, for instance, is a popular choice for most projects.
- Don’t Overlap Layers: Wherever possible, avoid pressing new tape strips over old ones. Adhesive buildup can complicate removal.
- Remove at an Angle: Maintaining that 45-degree pull isn’t just for aesthetics—it reduces stress on the paint and underlying surface.
- Check Your Technique: If paint begins peeling, switch directions and ease the tape off at a sharper angle (closer to parallel with the surface).
Dealing with Adhesive Residue
Oops—left the tape on too long, and now there’s sticky residue? Don’t worry! Here’s how to clean it up without damaging the surface:
- Warm Water and Dish Soap: Start with gentle solutions. Lightly scrub the residue with a sponge and warm, soapy water.
- Rubbing Alcohol or Vinegar: For tougher spots, rubbing alcohol or white vinegar can be effective. Apply with a cloth or cotton ball.
- Adhesive Remover: Products like Goo Gone are specially formulated to handle sticky residue. Just follow the instructions and ensure the surface is safe for use.
- Razor Blade: On hard, flat surfaces like glass, use a razor blade (carefully) at a shallow angle to scrape off dried adhesive.
Always perform a patch test with any cleaning solution to ensure it won’t damage the paint or finish.
Best Practices for Future Projects
The painter’s tape you use and how you apply it are just as important as when you remove it. Here are a few quick tips to prep for your next DIY masterpiece to sell:
- Choose tape based on your surface type (e.g., delicate surfaces require low-adhesion tape).
- Apply tape in long, even strips without stretching it. Press down firmly along the edges to create a tight seal.
- Remove tape promptly after painting to avoid all the issues we discussed earlier.
A Pro Finish Starts with Timely Tape Removal
Removing painter’s tape may seem like a small detail, but knowing when to remove painter’s tape can make all the difference in achieving a polished, professional finish. By timing the removal just right, understanding your paint type, and using the proper techniques, you’ll avoid common issues like residue, peeling, or uneven lines—all while keeping those clean, crisp edges.
Got more painting questions? Drop them in the comments—or better yet, put these tips into practice on your next project and see the difference perfect painter’s tape removal timing can make!